How to blur, pixelate, and hide certain parts of a photo on iPhone or iPad. Sometimes, before sharing your screenshot or just a photo, you want to hide some confidential information on them. It could be an address, a card number, dirty dishes in the background, or someone’s face. The iPhone and iPad provide the ability to blur or pixelate areas of an image, moreover, there are several ways to do this. With them, you can save the final result in the Photos app or share it via iMessage, WhatsApp, Twitter, Instagram and other social networks.
How to know by sound who sent a Viber message on iPhone?
Use markup
Markup is a useful tool built into the Photos app for iPhone and iPad. However, it is worth returning to the features of the free tool that will help you hide the desired parts of the image.
- Open an image in the Photos app on your iPhone or iPad and click Edit.
- Touch the Markup icon.
- Now you can use one of the suggested tools or a combination of them to hide parts of the image. After processing, click “Finish” to save the result:
Pen: Click on the pen icon to select it. After that, tap the same icon again to select the brush size.
Now select a colored tile to match the shade you want. Here you also need to make sure that the opacity is set to 100%, only in this way it will be possible to completely hide the details. If you just want a semi-transparent effect (which shows hidden parts through a veil), move the opacity slider to the left to around 85%. If you want to set your own brush color, tap the blue color picker icon in the top left corner.
Finally, use your finger on the photo to draw a line or shape to hide the desired part of the image. In the same way that crayon works on paper, the color will be darker if you run your finger over the same area multiple times.
Use of forms. Tap the plus sign and choose a square or circle shape.
Now add a shape to the photo to hide parts of it in the markup. After that, select the shape icon in the bottom left corner and select the solid fill option.
You can choose the fill color if you wish. Now place the resulting solid shape anywhere you want to hide the desired part of the image. In addition, you can also rotate the superimposed shape with two fingers. And by dragging the eight points on the perimeter of the shape, you can also change the shape, size of the square or circle to customize the final shape to your liking.
Use emoticons
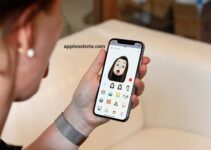
You may have already seen how people on social media, especially celebrities, hide their child’s face in a photo by adding emojis in place. You can do the same when posting Instagram stories using the app’s built-in tools. And you can do the following using markup in Photos:
- Tap the plus icon and select Text.
- Select text to add emoji to photo to hide sensitive part
- Then double click on the Text field and add the desired emoji using the pop-up keyboard.
- After that, hide the keyboard and tap the emoji. Now click on AA and use the slider to increase the size of the emoji. It remains to drag and place this emoticon anywhere in the photo, thereby hiding the desired part of it.
Use the Censor App
Censor is a free app with in-app purchases that allows you to blur and pixelate images on your iPhone. Here’s how you can use this utility:
- Select an image in the Censor app and tap the water drop icon to add blur. And to pixelate, tap the square icon with four tiny gray and black squares. It is located to the right of the “droplet”. You can choose to blur or pixelate with crisp, straight edges, or use freeform.
- Use your finger to cover the desired area of the image with a blur or pixelate effect.
- Finally, when finished, click the Share icon (on the right side of the top menu) to send the blurry or pixelated image via Messages, Mail, WhatsApp, AirDrop, etc. You can also click “Save Image” to save it to the Photos app.


